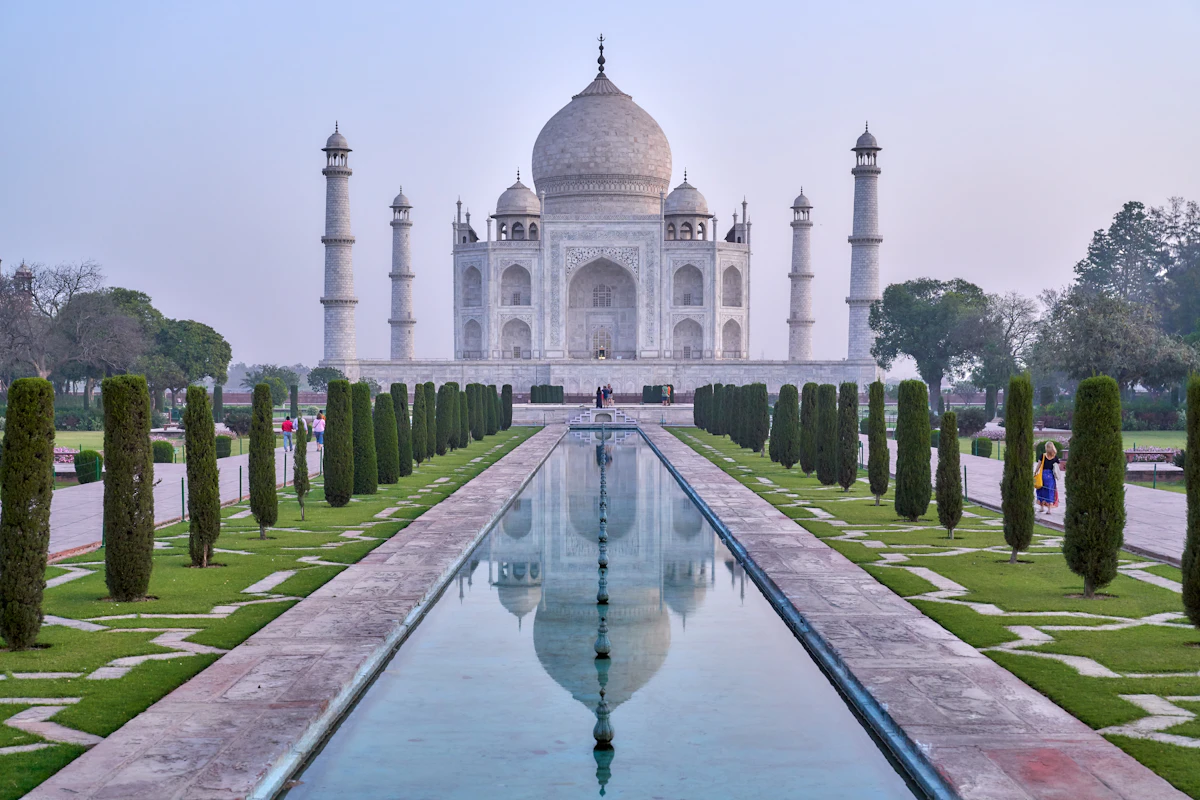
Filling the e-Visa Application Form India: Your Expert Guide
Navigating the e-Visa application form for India can feel complex, but this guide simplifies every step. Learn how to accurately complete the e-Visa application form India to ensure a smooth approval process.
Image selected to support the visa guidance topic. Always confirm final requirements before submitting your application.
Expert document review
Passport, photo, travel purpose, and supporting files checked before submission.
Clear rejection checklist
Each guide focuses on real mistakes that delay or weaken visa applications.
Private assistance service
We are not a government website; we help applicants prepare a stronger file.
India e-Visa review
Get the application checked before submission
We review passport details, photo quality, travel dates, category choice, and common rejection triggers.
The e-Visa application form India is an online digital interface that collects all necessary personal, passport, and travel details to assess your eligibility for an Indian e-Visa. Accurate and complete submission is paramount for approval.
The single most critical step in securing your India e-Visa is meticulously completing the e-Visa application form India. This digital form, accessible through the official India visa portal, acts as your primary communication with the reviewing body. It asks for comprehensive personal information, passport details, travel itinerary, and security declarations. Any discrepancies, omissions, or incorrect entries on this form are common reasons for delays or outright rejections, even for genuinely eligible travelers. Understanding each section and providing precise, verifiable information significantly increases your chances of a smooth approval.
Hello, I'm Falguni Patel. In my years reviewing visa applications at the Indian mission in Toronto, I saw countless applications for various visa types, including what's now known as the e-Visa. One consistent truth across all applications was this: the clearer, more accurate, and more complete the initial application form, the faster and smoother the process. This guide is built on that first-hand experience, focusing specifically on the e-Visa application form India, to help you avoid the pitfalls and navigate your submission with confidence.
Please note: ApplyeVisaIndia is a professional visa assistance hub. We provide expert guidance and review services to help you successfully complete your application, but we are not the official government website. Our aim is to simplify the complex requirements and increase your chances of approval.
What is the India e-Visa Application Form and Why is it So Important?
The India e-Visa application form is a multi-page digital document where you input all the information required by the Indian reviewing body to decide on your visa eligibility. It's not just a collection of fields; it's the digital representation of your intent to travel, your background, and your compliance with Indian immigration laws. From a consular officer's perspective, this form is the first, and often only, direct interaction we have with an applicant.
When I was reviewing applications, I'd always start with the form's consistency. Does the passport number match across all entries? Is the name spelled identically to the passport? Are the dates of birth correct? These seem like minor details, but they're foundational. A tiny typo on the e-Visa application form India can flag an application for manual review, adding days or even weeks to the process. This form is your chance to make a strong, clear case for your travel.
Key Takeaways for Your e-Visa Application
- Accuracy is Non-Negotiable: Every single detail must match your passport exactly.
- Prepare Documents First: Have all digital documents ready before starting the form.
- Double-Check Everything: There's no editing after submission; review meticulously.
- Apply Early: Give yourself ample time for processing, ideally 7-10 days before travel.
- Understand Visa Types: Choose the correct e-Visa category to avoid rejection.
- Professional Review: Consider expert review to catch mistakes before submission.
Before You Start: Essential Preparations for the e-Visa Application Form India
Preparation is key to a smooth application. Based on my experience, most avoidable issues arise from insufficient preparation. Think of it like this: you wouldn't start a long journey without checking your car. Similarly, don't start your e-Visa application without gathering your 'fuel' first.
Required Documents and Specifications
You'll need digital copies of the following. Pay close attention to the professional specifications:
- Scanned Passport Bio Page: This must be a clear scan of the page containing your photograph and personal details. It needs to be in PDF format, between 10 KB and 300 KB in size. Ensure all text is legible and there are no glares or shadows. This is the first thing an officer checks for identity verification.
- Digital Passport-Style Photograph: This is crucial. It must be a recent, front-facing photograph with a plain white background. The image should be in JPEG format, between 10 KB and 1 MB, with dimensions of 350x350 pixels. Your face must cover 70-80% of the photo, and your eyes must be open and clearly visible. Countless photos rejected for poor lighting, busy backgrounds, or incorrect dimensions.
- Additional Documents (Depending on e-Visa type):
- e-Medical Visa: You'll need a copy of a letter from an Indian hospital confirming your treatment, along with an English translation if not originally in English.
- e-Business Visa: A copy of a business card, invitation letter from an Indian company, or proof of business dealings is often required.
- e-Conference Visa: An invitation letter from the event organizer and political clearance from India's external-affairs authority are essential.
If you're unsure whether your documents meet these specifications, or need help converting them, ApplyeVisaIndia offers a document pre-check service to ensure everything is perfect before you upload. This can save you from rejection and re-application.
Technical Requirements and Browser Settings
The online application portal is best accessed using a modern browser like Chrome, Firefox, or Edge. Ensure your browser is updated, and JavaScript is enabled. Applicants frustrated by technical glitches that were simply browser compatibility issues. Clear your cache if you encounter problems.
Step-by-Step Guide: Navigating the e-Visa Application Form India
Let's walk through the actual fields you'll encounter. Approach each section methodically.
1. Initial Application & Personal Details
This is where you start. You'll select your visa type, nationality, port of arrival, and enter your email. The system will then generate a temporary application ID. Keep this ID safe! It allows you to save your progress and return later.
- Applicant Details: Full name (exactly as on passport), date of birth, place of birth, nationality, gender, and marital status.
- Passport Details: Passport number, date of issue, date of expiry, and place of issue. Ensure these match your passport's bio page precisely.
- Past Visa Information: If you've visited India before, you'll need to provide details of previous visas and visits. Don't omit this; the system can often cross-reference past entries.
2. Family Details and Occupation
This section requests your parents' names, nationalities, and places of birth. You'll also need to declare your occupation. This is one of those insider specifics: certain occupations (e.g., Journalist, Military personnel, NGO worker, Researcher) automatically trigger a deeper level of screening. A genuine tourist who selected 'Journalist' as their occupation still triggered extra screening — not because they were doing anything wrong, but because that category routes to a different review queue. Be honest, but be prepared for potential additional scrutiny if your occupation is in a sensitive field.
3. Address and Contact Information
Provide your current residential address, phone number, and email. Ensure this information is up-to-date and easily verifiable. Also, you'll provide details of an emergency contact in your home country.
4. Visa Details and Travel Itinerary
- Type of Visa: Reconfirm your chosen e-Visa category (Tourist, Business, Medical, etc.).
- Purpose of Visit: Be specific. 'Tourism' is generally fine, but 'visiting friends' or 'medical treatment' requires more detail.
- Expected Date of Arrival: Provide a realistic date. This helps the reviewing body understand your timeline.
- Port of Arrival: Choose the airport or seaport where you intend to first enter India.
- Places to be Visited: List the cities/states you plan to visit. It doesn't have to be exhaustive, but a general itinerary is helpful.
5. Previous Visa/Travel History & Security Questions
You will be asked about any previous visits to India, any past visa rejections, and details of any other countries you've visited in the last 10 years. This section also includes a series of security questions about criminal history, terrorism involvement, etc. Answer these questions truthfully and accurately. Any false declaration here is grounds for immediate rejection and potential future travel bans.
6. Document Uploads
This is where you upload your scanned passport bio page and digital photograph. This is another area where ApplyeVisaIndia's expert review can be invaluable, ensuring your documents meet all professional specifications before submission.
7. Review and Submit
Before you click 'submit,' the system will present you with a summary of your entire application. This is your absolute last chance to review every single field. I cannot stress this enough: review every character, every date, every choice. Once you submit and pay, changes are impossible, and any error means restarting the entire process and paying the fee again.
Common Mistakes Applicants Make on the e-Visa Application Form India
Having processed hundreds of applications, I can highlight the recurring errors that often lead to delays or rejections:
- Mismatched Names: The name on the application must be an exact, letter-for-letter match with your passport. This includes middle names, suffixes, and the order of names. Even a single letter difference can cause a flag.
- Incorrect Passport Details: Transposing numbers in your passport ID, entering an incorrect issue/expiry date, or mixing up issue/expiry locations. These are easily verifiable against your uploaded passport scan.
- Poor Quality Photo: The digital photo is a consistent problem area. Incorrect background color, blurry images, shadows, wearing glasses (unless for medical reasons), or not meeting the 350x350px dimensions. The system is quite strict.
- Inconsistent Information: Providing conflicting dates for previous visits, different occupations across sections, or listing a port of entry that doesn't match your itinerary. This raises suspicion.
- Selecting the Wrong e-Visa Type: Applying for a Tourist e-Visa when your primary purpose is business or medical. This is a common rejection reason. Be clear about your primary intent. For instance, if you're visiting family but also attending a short business meeting, you might need to consider if business is your *primary* purpose.
- Leaving Fields Blank: Even if a field seems optional, if you have the information, provide it. Incomplete applications often sit in a 'pending information' queue.
- Ignoring the Security Questions: Answering 'No' to all security questions without fully understanding them. Honesty is crucial.
Approval Strategy and Pro Tips from a Former Consular Officer
My goal was always to facilitate legitimate travel, and these tips are designed to help you present your application in the best possible light:
- Start with the Official Instructions: Always refer to the guidelines on the official India visa portal. While this guide offers expert insights, the official site is the ultimate source of rules.
- Use a Checklist: Create a physical checklist of all required documents and form fields. Tick them off as you go.
- Scan Documents Professionally: Don't take photos of documents with your phone if you can avoid it. Use a flatbed scanner or a dedicated scanning app for crisp, clear PDFs and JPEGs. Ensure files are correctly sized.
- Consistency is Key: Ensure every piece of information you provide is consistent across all documents and form fields. Your passport is your primary identity document, so everything must align with it.
- Be Specific, Not Vague: When asked for addresses, visit places, or purpose of visit, provide concrete details. 'Sightseeing' is okay, but 'visiting Taj Mahal, Agra and historical sites in Delhi' is better.
- Consider a Professional Review: Especially for first-time applicants or those with complex travel histories, having an expert review your completed e-Visa application form India and supporting documents before submission can catch critical errors. ApplyeVisaIndia offers this service to significantly boost your success rate.
- Print a Copy: Once submitted, print or save a copy of your completed application form for your records. This can be useful for reference during your trip or if you need to contact the reviewing body.
- Use Consistent Email: Use the same email address throughout the application process, and ensure it's one you check regularly for updates.
When You Should NOT Apply Yet (and What to Do Instead)
Sometimes, the best strategy is to wait. Here are scenarios where you should hold off on filling out the e-Visa application form India:
- You Don't Have a Confirmed Travel Date: While you don't need a flight booked, having a realistic entry date is important. Applying too early with vague dates might mean your visa expires before your actual travel, especially with shorter validity e-Visas.
- Your Passport Expires Soon: Your passport must be valid for at least six months from your date of arrival in India. If it's less, renew your passport first. I always advise first-time travellers to ensure at least nine months of validity to be safe.
- You Haven't Gathered All Documents: Do not start the form and then scramble for documents. Gather everything, resize photos, and convert PDFs before logging in. An incomplete application saved for too long can sometimes time out or become problematic.
- You Are Unsure of Your e-Visa Type: This is a critical point. Are you a tourist, a business visitor, or seeking medical treatment? Each has specific requirements. If you apply for the wrong type, it will be rejected, and you'll lose the fee. If you're visiting family but also plan to explore investment opportunities, you need to weigh which activity is primary. Consult our India e-Visa complete guide or Complete Indian Visa Guide to clarify.
- You've Had a Previous Rejection or Overstayed a Visa: If you have a history of visa rejection for India or have overstayed a previous visa, the e-Visa route might be more difficult. You might need to contact the Indian Embassy or Consulate directly for a regular visa, as your case will likely require more detailed scrutiny.
Common Misconceptions About the India e-Visa Form
Let's debunk a few myths I often encountered:
- Myth 1: "I just need to fill in basic details; they don't check everything."
Reality: Every field is there for a reason and is checked. The reviewing body employs sophisticated cross-referencing. Any inconsistency or omission can flag your application for manual review, slowing down the process considerably. For example, your occupation choice might trigger a check against international watch lists or require additional background investigation.
- Myth 2: "A 'complete-looking' application will get approved."
Reality: An application can look complete but still contain errors (like mismatched names or an invalid passport number) that lead to rejection. The quality and accuracy of the information, not just its presence, are what truly matter. Applications with every field completed are still held when there are minor discrepancies between the data entered and the uploaded passport scan.
- Myth 3: "The 5-year e-Tourist Visa is always the best option."
Reality: Honestly, the 5-year visa is overkill for most people, and here's why: it's more expensive, and if your travel plans are uncertain beyond a year, you might be paying for validity you don't use. For many, the 30-day or 1-year multiple-entry e-Visa is sufficient and more cost-effective. Evaluate your actual travel needs before opting for the longest validity. A 1-year multiple entry visa allows up to 180 days stay per visit, which is ample for most tourists.
- Myth 4: "I can change my travel dates after applying."
Reality: While you can often enter India within the visa's validity period, the "Expected Date of Arrival" gives the reviewing body an idea of your plans. Major deviations without reasonable cause, especially if applying very close to the expected date, could raise questions. Once approved, the e-Visa validity period starts from the date of Electronic Travel Authorization (ETA) issuance, not your intended arrival date.
Applying for your e-Visa: Where to Go and How We Help
The official portal for applying for your India e-Visa is the official India visa portal. This is where you will fill out the e-Visa application form India, upload your documents, and make payment.
While the official site provides the platform, navigating its nuances can be challenging. That's where ApplyeVisaIndia comes in. As a professional visa assistance hub, we offer a streamlined application process, expert guidance, and meticulous document review services. We translate the complex governmental requirements into plain, simple English, ensuring you understand every step.
Our service means you won't be left guessing about photo specifications or document sizes. We provide a safety net, reviewing your application before submission to catch common errors that could lead to rejection. This concierge-level support is designed to provide you with peace of mind and significantly increase your chances of a successful e-Visa approval.
Ready to start your application with confidence? Apply for Indian e-Visa here.
For more detailed information on specific visa types or requirements, explore our other resources, such as our guide to Indian Business e-Visa requirements, or how to manage extending your e-Visa in India. We also have country-specific guides, like our detailed page for US citizens applying for an e-Visa.
Conclusion
Successfully completing the e-Visa application form India is a precise task, but with careful preparation and attention to detail, it's entirely manageable. Accuracy, consistency, and adherence to professional specifications are the cornerstones of a successful application. Avoid the common pitfalls, leverage our expert tips, and consider professional assistance if you feel unsure. Your incredible journey to India begins with a well-prepared application, and we're here to help you make it a reality.
Don't Risk a Rejection or a Ruined Trip
One small mistake — a name that doesn't match your passport, the wrong occupation, a non-compliant photo, or the wrong visa category — can get your India e-Visa rejected or frozen in review for weeks. Government fees are non-refundable, a rejection can flag your passport for future applications, and most travelers only find out after they've paid and their flight is days away.
Our visa experts check every detail before submission, catch the errors that cause rejections, and back it with 24/7 human support — so you board your flight with total peace of mind.
Apply Safely With Expert Review →
Reviewed By
Falguni Patel
Former Indian Consular Officer, Toronto
"Former consular officer at the Indian mission in Toronto, Canada, with first-hand experience processing visa and travel-document applications. Now guides international travelers through the Indian e-Visa process."
View author profileFrequently Asked Questions
What is the typical processing time for an India e-Visa?
Generally, e-Visa applications are processed within 72 hours, though it can take up to 5 business days. It's advisable to apply at least 7 days before your intended travel date to account for any potential delays or requests for additional information.
Can I edit my India e-Visa application after submission?
No, once an e-Visa application has been submitted and the fee paid, it cannot be edited. Any errors will require you to submit a new application and pay the fee again. Carefully review all details before final submission.
What documents are required to fill out the e-Visa application form India?
You'll need a digital copy of your passport bio page, a recent digital passport-style photo (meeting specific dimensions), and sometimes onward travel tickets or accommodation details. Ensure all documents are clear and conform to professional specifications.
Is an interview required for the India e-Visa application?
Typically, no interview is required for the India e-Visa. The process is entirely online. However, in rare cases, the reviewing body may request additional information or a brief virtual clarification if discrepancies are found in your application.
How long is the India e-Visa valid for?
The validity varies by e-Visa type. Tourist e-Visas are often valid for 30 days (single entry), 1 year (multiple entry), or 5 years (multiple entry), depending on the option chosen and approved. The allowed stay per visit also differs.
What if my e-Visa application is rejected?
If your e-Visa application is rejected, you will receive an email notification. You may need to apply for a regular sticker visa at an Indian Embassy or Consulate. The e-Visa fee is non-refundable in case of rejection.
Official Sources
- Government of India e-Visa portal: indianvisaonline.gov.in
- Bureau of Immigration, India: boi.gov.in
Apply eVisa India is a private visa-assistance service. We are not affiliated with the Indian government.